
Creating a Connection
Click the “plus” button on the navigation menu next to “Data Sources” to add a new connection. Change the Connection Type to Snowflake.
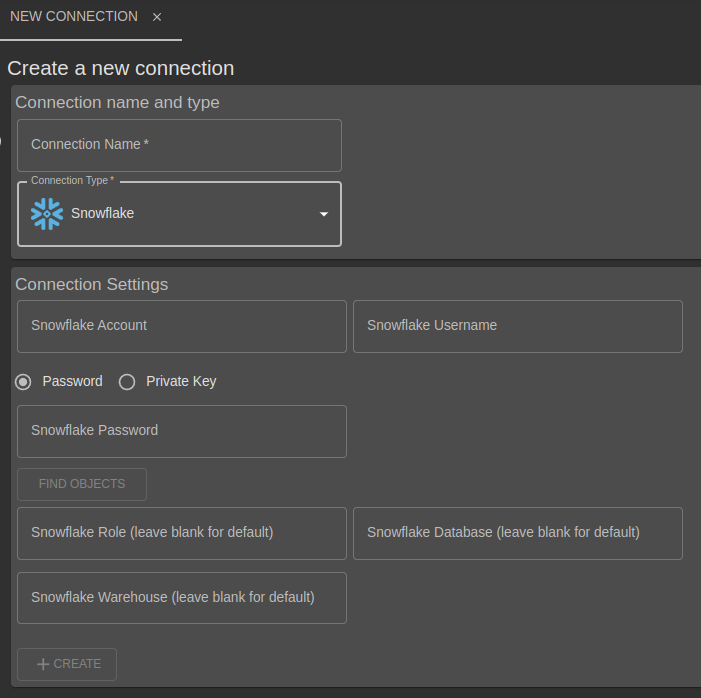
Complete the Connection Settings and click “Create”.
Once you have completed the account, username and password / private key, you may use the “Find Objects” button to list available roles, databases and warehouses to choose from.
If the database and/or warehouse is only available to certain roles, you may choose from the available roles first, then click “Find Objects” a second time to find databases and warehouses available to the selected role.
Alternatively, if you know the role, database and warehouse you can enter them directly.
If any of role, database or warehouse are left blank, the default (if any) for the user will be assumed.
| Setting | Values |
|---|---|
| Snowflake Account | Your snowflake account. Accounts may include a region and cloud provider specifier, but you should not include the suffix .snowflakecomputing.net. An example in an EU region running on Google Cloud might look myaccount.europe-west2.gcp |
| Snowflake Username | Your Snowflake username |
| Snowflake Password (Optional) | Your Snowflake password Snowflake sign-in using a password without an MFA may not work. Instead setup a Private Key instead This password is stored in a secrets store using 256-bit AES-GCM encryption. You can reset a new value any time but never view the existing value once set. |
| Snowflake Private Key (Optional) | Setup a keypair using the Snowflake documentation , and enter the private key text here. Do not include “-----BEGIN PRIVATE KEY---” or “----END PRIVATE KEY-----” lines, just the key text in between. This private key is stored in a secrets store using 256-bit AES-GCM encryption. You can reset a new value any time but never view the existing value once set. |
| Snowflake Database | The Snowflake database containing your data |
| Snowflake Role | The Snowflake role to connect as |
| Snowflake Database | The database to use |
| Snowflake Warehouse | The compute warehouse used by the connection |
As with all new connections, you should now scan for metadata to make tables/views available for analysis.
The data connection is now available within any of the analysis types.
Editing an existing connection
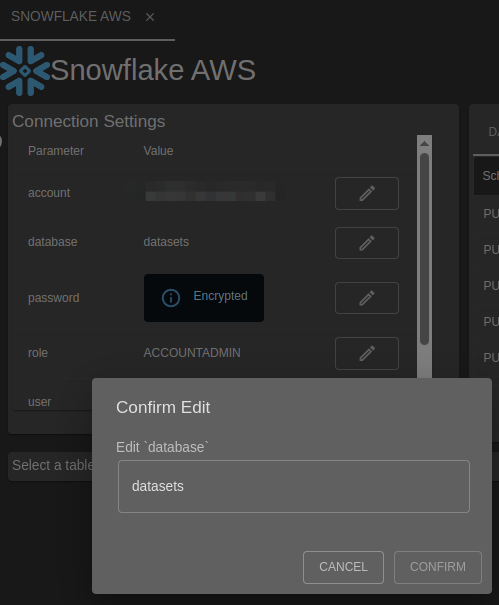
Once saved, use the pencil icon to change an existing setting.
Required permissions
For model fitting we only require read-only access to your data and the various “SHOW” commands and the Information Schema. If you want to export bulk predictions back to the database, that will require more permissions to the target tables.
Viewing tables and data
Once a connection has been established, use the general help in Creating and Managing Database Connections to view tables, views and data previews.
Deleting a Connection
Deleting a connection only removes the settings, the database itself isn’t changed.